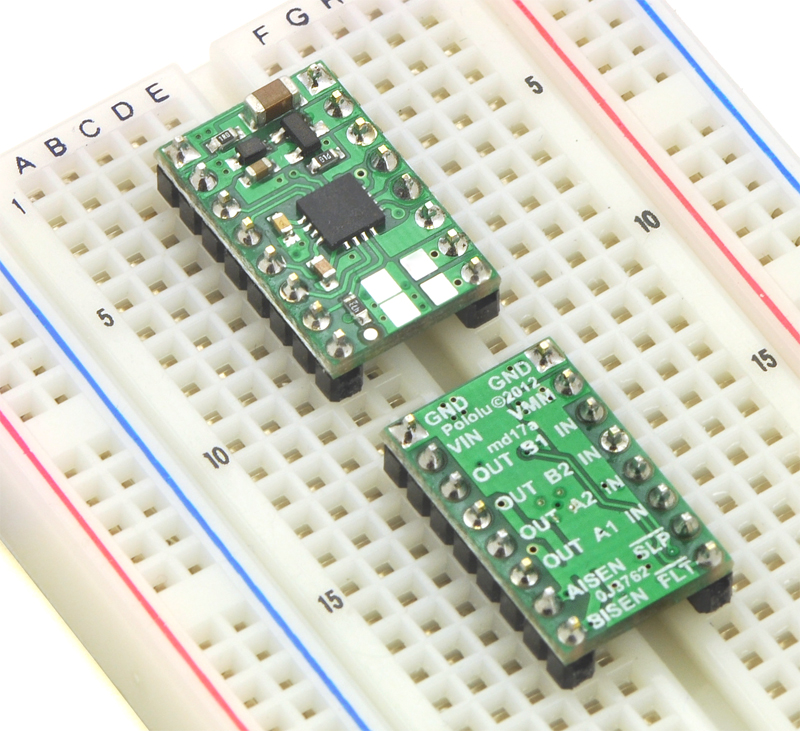
DRV8833 sells for around $6, but it performs beyond expectation without all the flufy hardware surrounding your typical motor controller extension board or hat.
With stand-up pins, it could sit nicely on a breadboard or permanent proto-board.

What you need in this setup:
- Raspberry Pi 2
- SD Card running Raspbian
- Power supply for the Pi
- 2x DC motors
- Power supply for the 2 motors
- Breadboard
- 5-7 female to male wires (with breadboard) or female to female wires (without breadboard)
- Some sort of SSH login mechanism via wifi, ethernet ports or UART cable from your PC.
 Wiring
1. Attach DRV8833 module into a bread board or you could use the pins directly.
2. On the left side of the module connect the following wires between GPIO and the chip:
GPIO 25 <—> AIN1
GPIO 18 <—> AIN2
GPIO 23 <—> BIN1
GPIO 24 <—> BIN2
GND <—> The left GND
Optionally you could connect to nSLEEP and nFAULT for more advance setup
3. On the right-hand side, connect the following:
Right DC motor + <—> AOUT1
Right DC motor – <—> AOUT2
Left DC motor + <—> BOUT1
Left DC motor – <—> BOUT2
Battery +<—> VIN
Battery – <—> The right GND
Programing the GPIO
There are a few methods you can control the GPIO pins with Python: Rpi.GPIO, WiringPi, or pigpio. The pigpio library is the most flexible because it can bring out the best both the software and hardware PWM capabilities of the Pi and make them available in any GPIO pins you chose. Please download from their official site: http://abyz.co.uk/rpi/pigpio/download.html
Follow the instruction to install it on your pi and run its daemon: sudo pigpiod
For simple testing purpose, create and save the following file into motor.py:
import time
import pigpio
MOTOR_A1 = 25
MOTOR_A2 = 18

#connect to pigpiod daemon
pi = pigpio.pi()

# pi set frequency
pi.set_PWM_frequency(MOTOR_A2, 100)

pi.set_servo_pulsewidth(MOTOR_A1, 0)
pi.set_PWM_dutycycle(MOTOR_A2,255)
time.sleep(1)

#disconnect
pi.stop()
Run it with sudo python3 motor.py

