Build a Wireless Hot-spot Access Point with Raspberry Pi 2
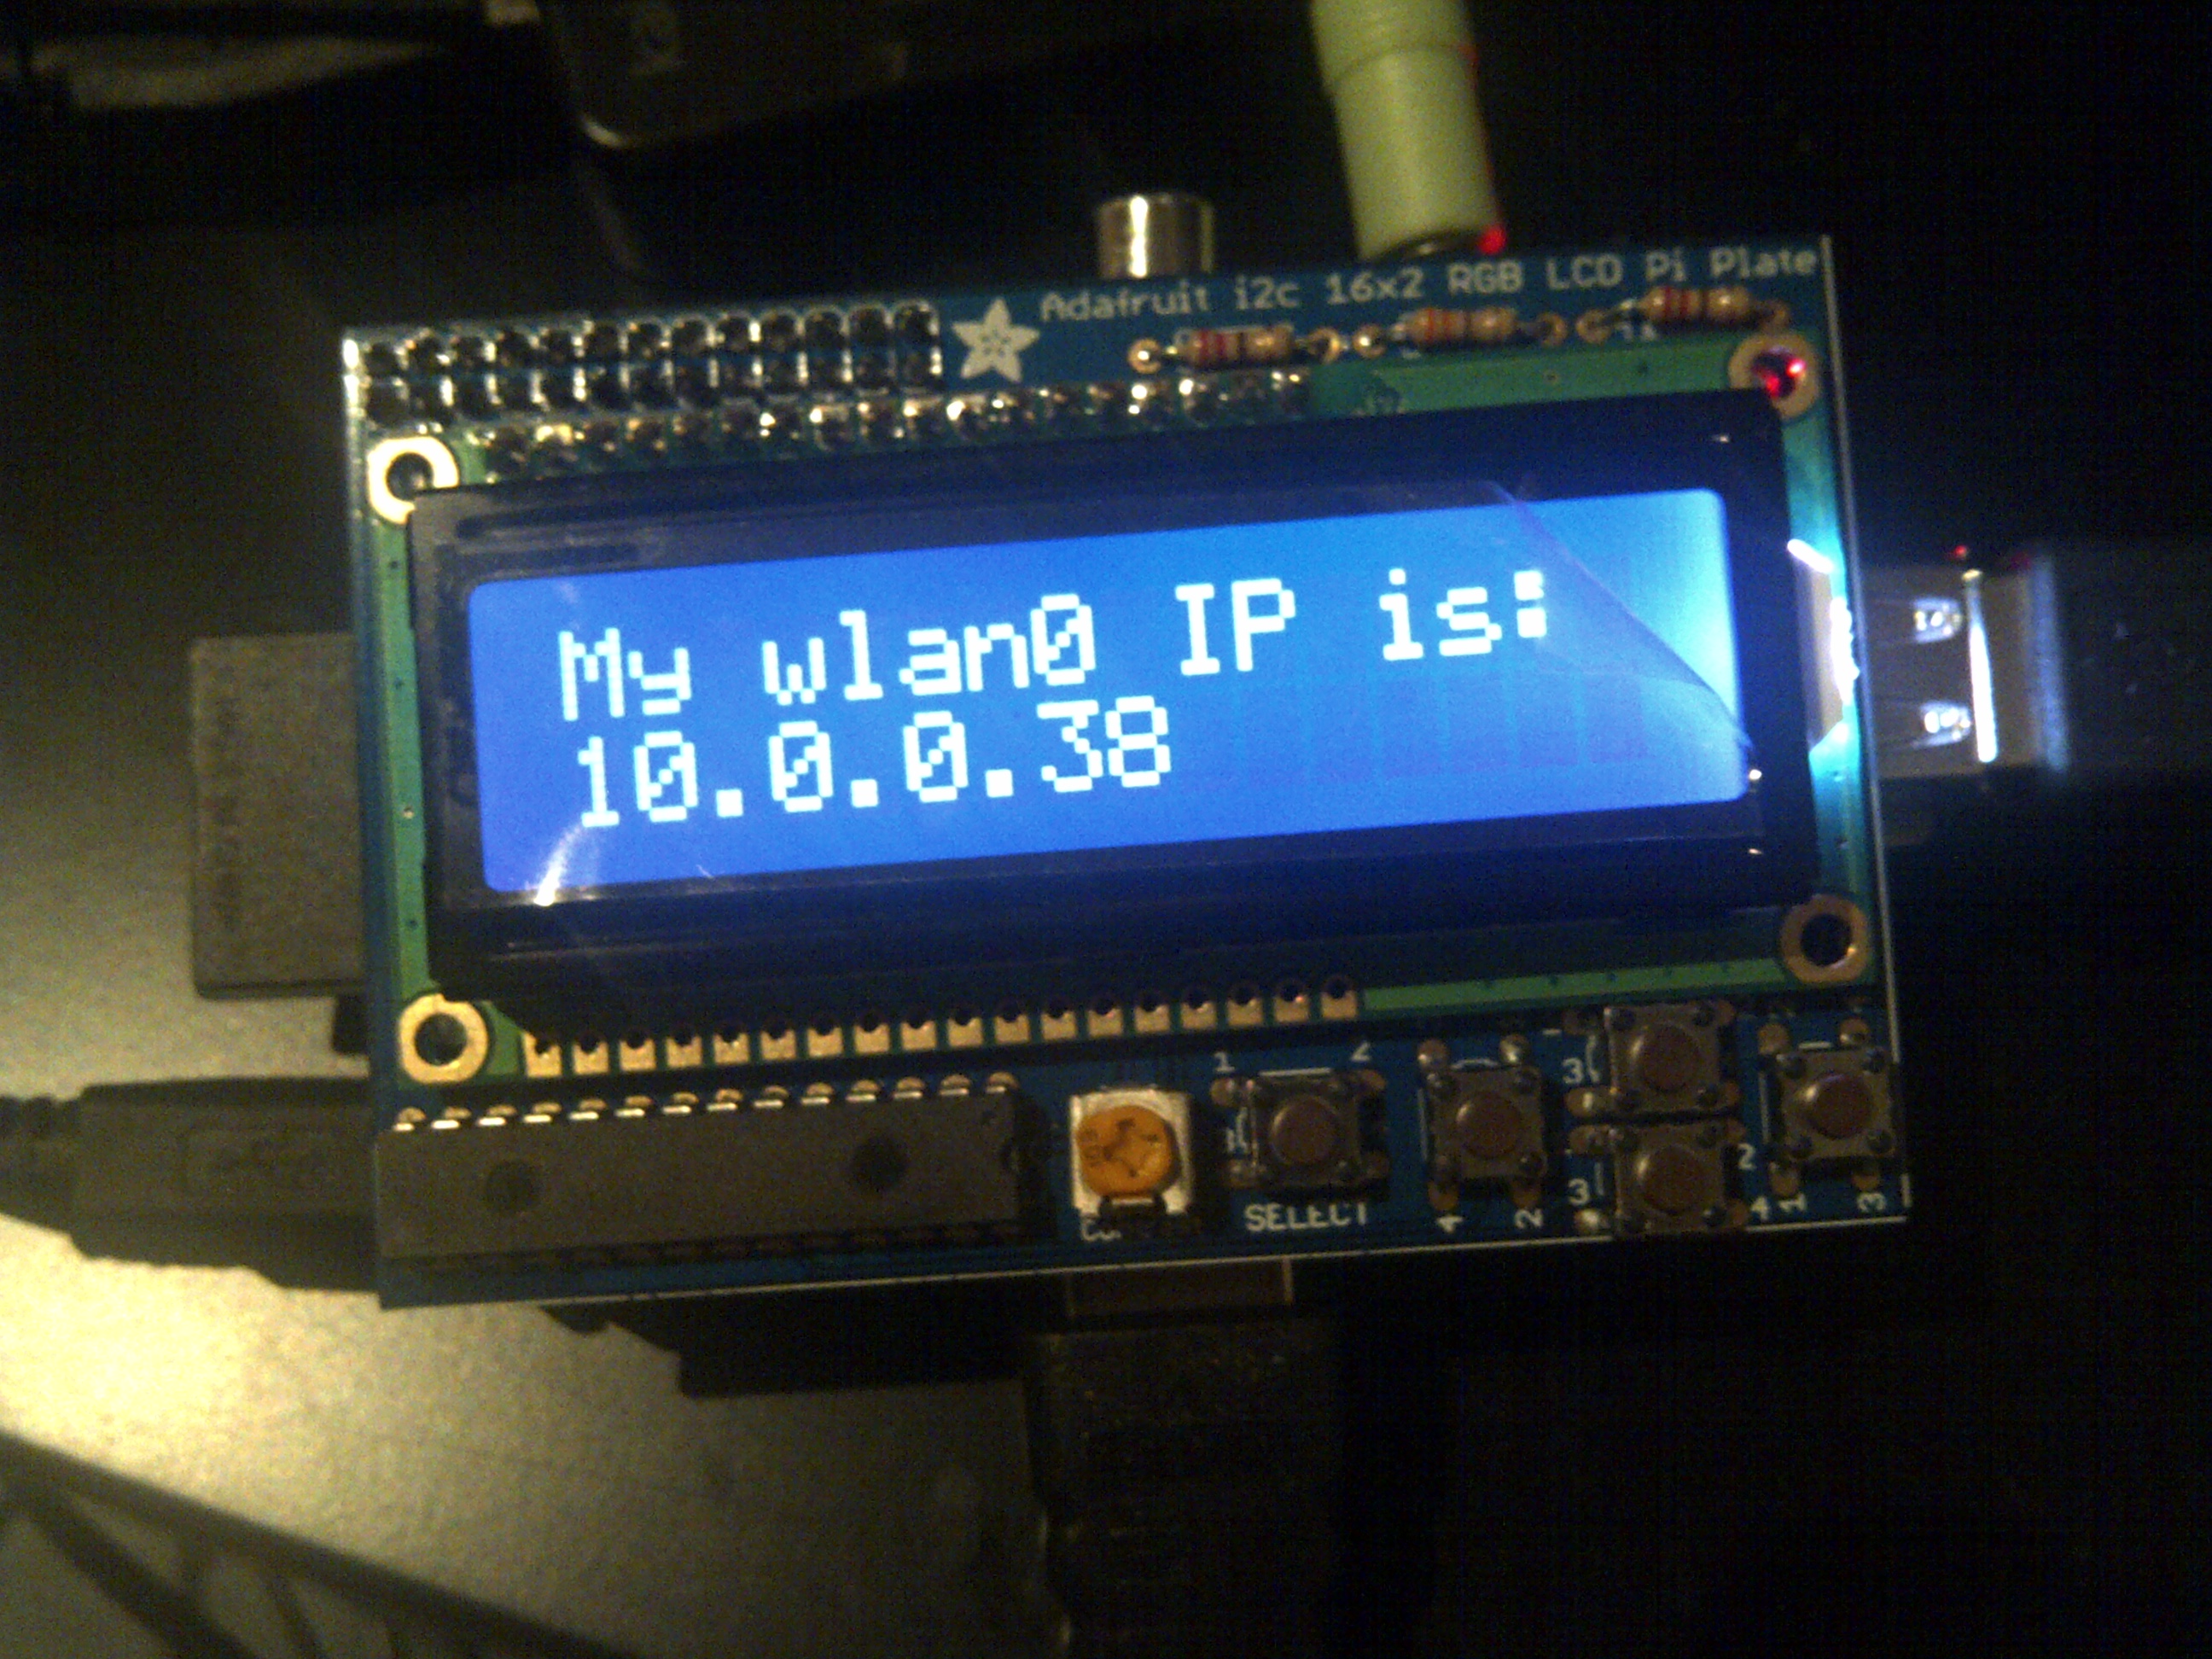
Why you want a Pi 2 hot spot? To extend the range of your current wifi router Direct access to your Pi robot without waiting for a router to manage your connections. 1-to-1 is obviously faster then 1-to 1-to-1. To share Pi’s Internet connection with multiple devices Hardware list: Raspberry…
Install USB Wifi Dongle Realtek 8188 Driver on Raspbery Pi 2
Regardless of the dongle manufacturer, any wifi dongle that uses Realtek 8188 chip is known to be fast and reliable. However Raspbian does not have a native support out-of-the-box. We need to manually install the driver before we can use it. Update your Rasbpian: sudo apt-get update (Optional) If you…
Raspberry Pi + Pololu Maestro + Python3 + Tornado + Servo Control Part 3
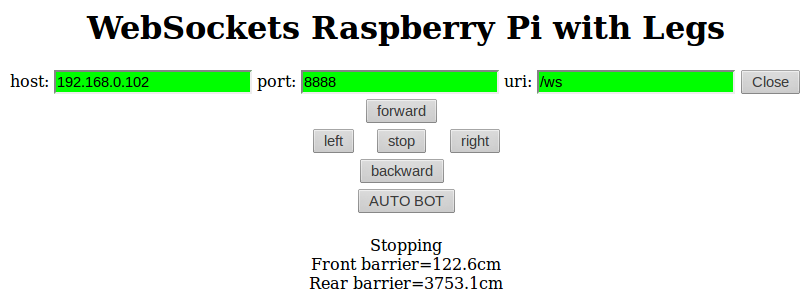
So we have all the backbone software ready as discussed in Part 2, now we want to create the interface. We basically need JQuery to handle the button interaction. Once a button is clicked, it will send a command to the server via WebSocket. The server needs to relay the…
Raspberry Pi + Pololu Maestro + Python3 + Tornado + Servo Control Part 2
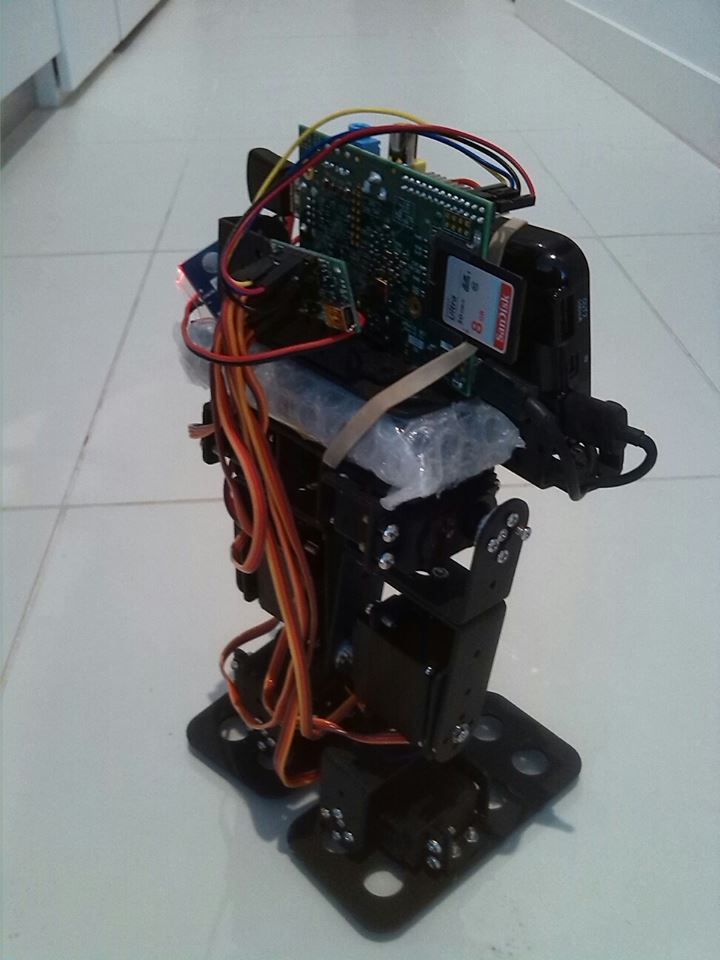
In Part 1 we discussed ways to connect all the hardware together. For there software component, there are 4 different technologies involved: Device.py, which provides byte commands to Pololu Maestro discussed previously. DeviceController.py, which provides servo control via function calls on the Device Driver object. TornadoServer.py, which serves the web…
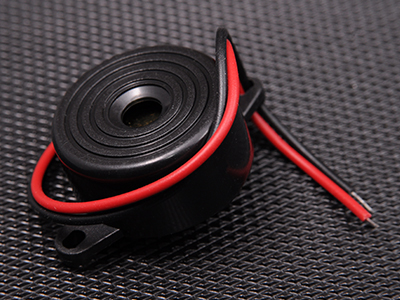
How to play piezo buzzer tunes on Raspberry Pi GPIO with PWM
1. Connect the red wire of the buzzer to GPIO Pin 5 and the black one to GPIO ground 2. Copy the following code into buzzer.py 3. Run it with this command: sudo python3 buzzer.py 4. You can also use this as a module in your robot project. import RPi.GPIO…


