Robot Project Day 3 – Gertboard
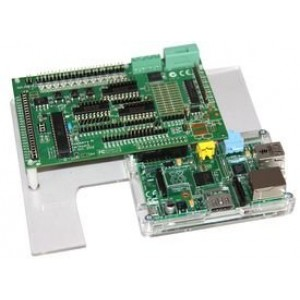
Previous: Day 2 – Raspberry Pi The Gertboard bottom socket goes into Raspberry GPIO headers. Please upload a test programs into its ATMega pins. There are a lot of tutorials about this, or you can also refer to Gertboard User Manual. Go to Gertboard ATMega Pin Setup for a proper…
Robot Project Day 2 – Raspberry Pi
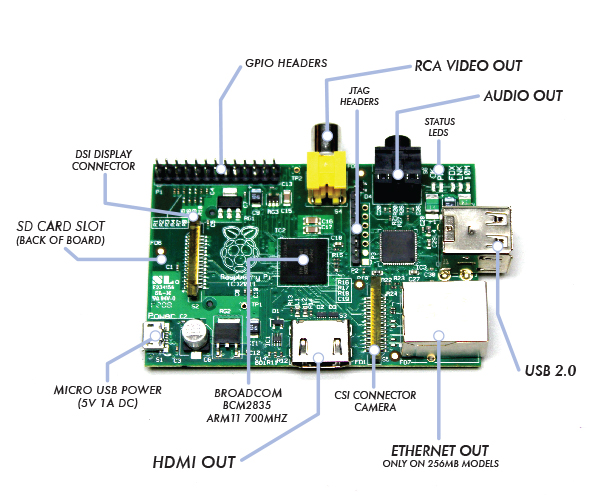
Previous: Day 1 – Chassis and Motors The Pi is essential as the heart and brain of the robot. This with the help of Gertboard which turns the Pi into an Arduino compatible device, is crucial for sending commands to the motors and servos. The Pi runs Raspbian with an…

Robot Project Day 4 – Motor Controller
Previous: Day 3 – Gertboard Setup Configuring Motor Controller At LinuxCircle we are happy with Dagu 4-Channel Motor Controller Board. Connect each motor to its corresponding motor ouput. Prepare 8 jumper wires for the micro controller pins to be connected to your Gertboard and 4 jumper wires to your current supply pins….
Robot Project Day 1 – Chassis & motors
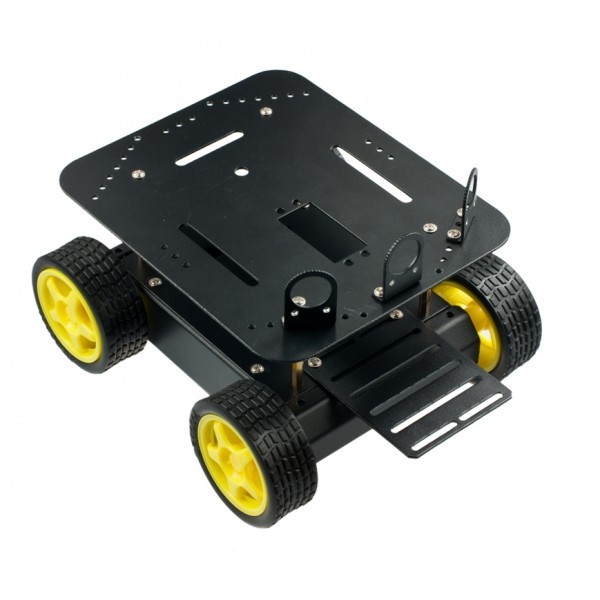
Previous: Day 0 – Procurement & Preparation Chassis Theare are a few off-the-shelf solutions to assemble the chassis and motors. Key points to consider includes: 4WD vs 2WD If you have 4 separate motors you can consider to have 4-channel motor controller which makes it a pure all wheel drive, or if you…

Power supply circuit: Voltage regulator converter from 7.2 V to 5V and 6V
Problem: Need a constant 5V supply with enough capacity for robot or Raspberry Pi. This needs to be regulated. Consideration 1: 7.2V Ni-MH battery with at least 3000 miliAmper per hour (mAh), but if voltage is too big it will burn the Pi! Consideration 2: 4 x 1.2V Rechargeable AA battery that will supply 4.8V, this won’t…
")

